Introduction

Sushi is a popular Japanese dish known for its fresh and delicate flavors. One of the key components of a great sushi experience is high-quality salmon. Curing salmon for sushi-grade preparation is essential to ensure its safety and enhance its flavor and texture. This process involves selecting the right salmon, cleaning and deboning it, and applying a curing mixture. Proper refrigeration and aging are also critical steps. Slicing the cured salmon into perfect sushi-ready slices and serving it alongside other sushi ingredients completes the process. In this article, we will explore the step-by-step process of curing salmon for sushi and creating delicious sushi dishes at home.
Background Information On Sushi And The Importance Of High-quality Salmon
Sushi is a popular Japanese dish known for its fresh and delicate flavors. It consists of vinegared rice combined with a variety of ingredients, including raw fish, such as salmon. The quality of the salmon is crucial in ensuring a delicious sushi experience. High-quality salmon provides a buttery and melt-in-your-mouth texture, while also delivering a rich flavor. The freshness of the salmon guarantees its safety for consumption, as proper handling and sourcing are essential to prevent contamination and maintain its sushi-grade status. Choosing the right salmon and properly curing it enhances the overall taste and elevates the sushi dining experience.
Understanding The Process Of Curing Salmon For Sushi-grade Preparation
The process of curing salmon for sushi-grade preparation is essential to ensure its safety and enhance its flavor and texture. There are two main techniques used: salt curing and vinegar curing. Both methods kill and reduce bacteria present on the fish’s surface. Salt curing involves coating the salmon fillets with a mixture of salt and sometimes sugar, which draws out moisture while adding flavor. Vinegar curing involves marinating the salmon in a mixture of rice wine vinegar and water, which helps to denature the proteins and kill any bacteria present. Properly curing the salmon is crucial to achieving the desired sushi-grade quality.
Selecting The Salmon

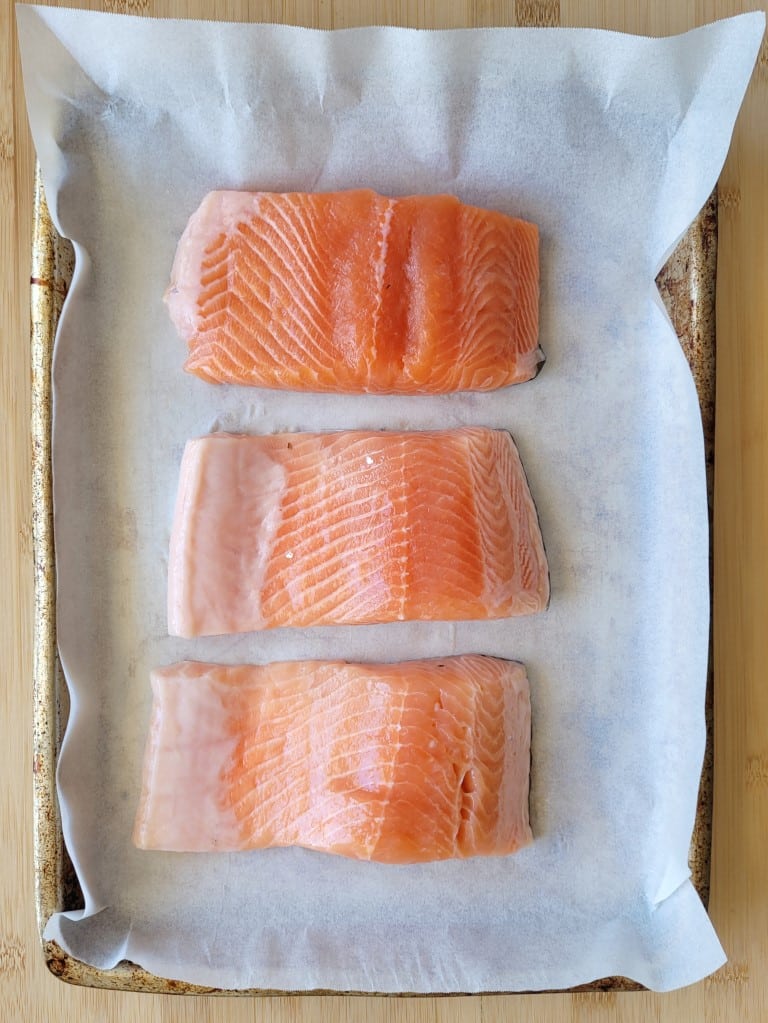
When selecting salmon for sushi-grade preparation, it is important to choose fresh and high-grade fish. Look for salmon that has a vibrant color and firm texture. It should have a pleasant smell, resembling the ocean. Consider whether you prefer wild-caught or farm-raised salmon, keeping in mind that both can be suitable for sushi if sourced properly. It is essential to buy salmon from reputable sources to ensure its quality and safety. Remember to ask your fishmonger for advice and guidance on selecting the best salmon for sushi.
Choosing Fresh And High-grade Salmon For Sushi Preparation
When selecting salmon for sushi, it is essential to choose fresh and high-grade fish. Look for salmon that has a vibrant color and firm texture. It should have a pleasant smell, resembling the ocean. Consider whether you prefer wild-caught or farm-raised salmon, keeping in mind that both can be suitable for sushi if sourced properly. It is crucial to buy salmon from reputable sources to ensure its quality and safety. Remember to ask your fishmonger for advice and guidance on selecting the best salmon for sushi. [7] [8]
Choosing Between Wild-caught And Farm-raised Salmon
When it comes to selecting salmon for sushi, you have the option to choose between wild-caught and farm-raised salmon. Here are some factors to consider:
- Wild-Caught Salmon: Wild-caught salmon is known for its natural and robust flavor. It is caught in the open ocean, and its diet consists of a variety of marine organisms. This results in a more diverse and superior taste.
- Farm-Raised Salmon: Farm-raised salmon is raised in controlled environments, such as fish farms or aquaculture facilities. It is fed a controlled diet and is typically more readily available and affordable.
Ultimately, the choice between wild-caught and farm-raised salmon depends on personal preferences and considerations such as sustainability, taste, and availability.
Preparing The Salmon

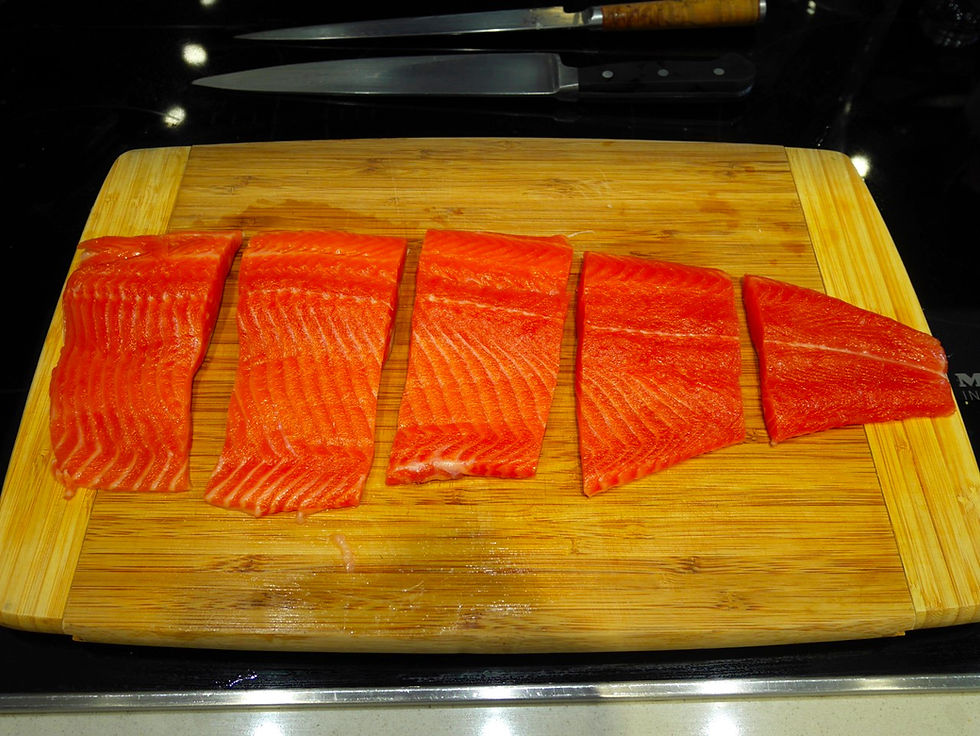
To prepare the salmon for sushi, it is important to clean and debone the fish properly. Start by rinsing the salmon fillets under cold water to remove any impurities. Use a sharp knife to carefully remove the skin and scales, if desired. Next, remove any remaining bones from the fillets using tweezers or needle-nose pliers. Once the salmon is cleaned, cut it into sushi-grade fillets of the desired thickness. Remember to use a clean cutting board and keep all utensils sanitized to ensure food safety.
Cleaning And Deboning The Salmon
Cleaning and deboning the salmon is a crucial step in preparing sushi-grade salmon. Start by rinsing the salmon fillets under cold water to remove any impurities. Use a sharp knife to carefully remove the skin and scales, if desired. Next, remove any remaining bones from the fillets using tweezers or needle-nose pliers. It is essential to ensure that the salmon is completely bone-free to avoid any unwanted surprises while enjoying your sushi. Remember to keep all utensils sanitized and use a clean cutting board for food safety.
Cutting The Salmon Into Sushi-grade Fillets
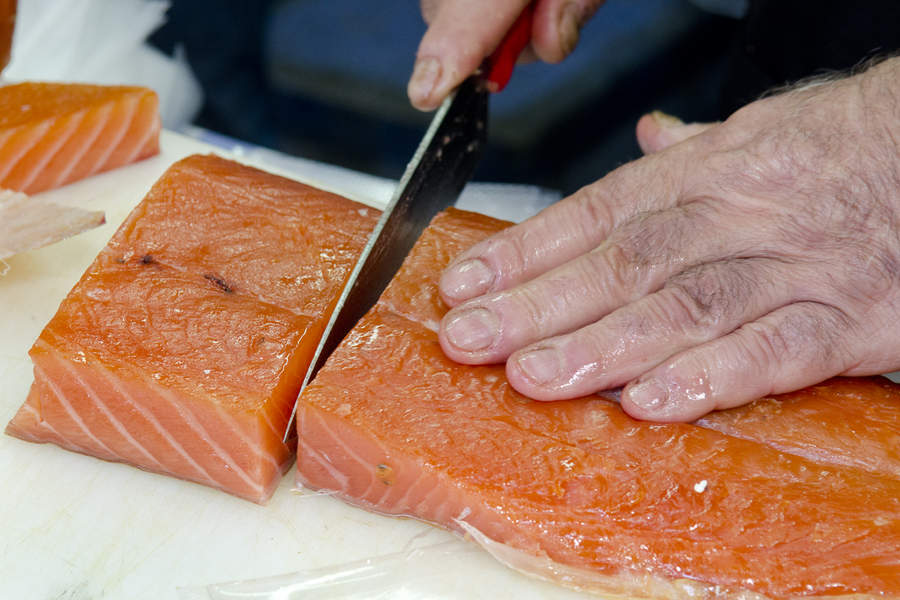
After cleaning and deboning the salmon, the next step is to cut it into sushi-grade fillets. Start by placing the salmon fillet on a clean cutting board. Using a sharp, non-serrated knife, slice the fillet at a 45-degree angle to create thin, uniform slices. The thickness of the slices will depend on personal preference, but around 1/4 inch is typical for sushi. To achieve the best results, ensure that each slice is smooth and even, as this will enhance the presentation of your sushi rolls or sashimi.
Curing The Salmon

Curing the salmon is a crucial step in preparing sushi-grade salmon. There are different methods of curing, including using salt, sugar, or a combination of both. The curing process helps to remove moisture from the salmon, which enhances its flavor and texture. To cure the salmon, the chosen mixture is applied to the fillets, covering them entirely. The salmon is then refrigerated for a specific period, allowing the curing process to take place. This process not only adds flavor but also acts as a preservative, extending the shelf life of the salmon. Properly cured salmon is essential for achieving the desired taste and quality in sushi dishes.
Choosing The Curing Method: Salt, Sugar, Or A Combination Of Both
When it comes to curing salmon for sushi, there are different methods you can choose from – salt curing, sugar curing, or a combination of both.
Salt curing is a traditional method that draws out moisture from the salmon, intensifying its flavor and preserving it. This method is simple and effective.
Sugar curing, on the other hand, adds a subtle sweetness to the salmon while also helping to remove moisture. It can complement the savory flavors of sushi.
Alternatively, you can combine both salt and sugar for a balanced flavor profile. Experimenting with different ratios of salt and sugar allows you to customize the curing process to your taste preferences.
No matter which method you choose, be sure to apply the curing mixture evenly to the salmon fillets for consistent results.
Applying The Curing Mixture To The Salmon Fillets
After selecting the curing method, it’s time to apply the mixture to the salmon fillets. Start by evenly coating the fillets with the curing mixture, ensuring that every part is covered. The curing mixture can be a combination of salt and sugar or just one of them, depending on your preference. Gently massage the mixture into the fillets to ensure that it penetrates the flesh. This step is crucial as it helps to draw out moisture and infuse the salmon with flavor. Once the fillets are fully coated, let them sit in the refrigerator for the specified curing time to achieve sushi-grade results.
Refrigeration And Aging

After applying the curing mixture to the salmon fillets, it is important to properly refrigerate them to ensure food safety. Place the fillets in an airtight container or wrap them tightly in plastic wrap before placing them in the refrigerator. This helps to prevent the growth of harmful bacteria. Additionally, aging the salmon in the refrigerator for a certain period of time can enhance its texture and flavor. The recommended aging time can vary depending on personal preference, but typically ranges from 24 to 48 hours. During this time, the flavors of the curing mixture penetrate the salmon, resulting in a richer taste.
Properly Refrigerating The Cured Salmon
After applying the curing mixture to the salmon fillets, it is important to properly refrigerate them to ensure food safety. Place the fillets in an airtight container or wrap them tightly in plastic wrap before placing them in the refrigerator. This helps to prevent the growth of harmful bacteria. It is recommended to refrigerate the salmon for at least 24 to 48 hours to allow the flavors of the curing mixture to penetrate the fish, resulting in a richer taste. Remember to check the expiration date of the salmon and consume it within a few days of refrigeration.
Aging The Salmon To Enhance Texture And Flavor
Aging the salmon is an essential step in the curing process that helps to enhance the texture and flavor of the fish. After the initial curing period, the salmon is typically aged for an additional 24 to 48 hours in the refrigerator. This allows the flavors to further develop and mellow, resulting in a richer and more complex taste. Additionally, the aging process helps to firm up the flesh of the salmon, making it easier to slice into thin, delicate pieces for sushi. Overall, aging the salmon is crucial for achieving the desired sushi-grade quality.
Slicing And Serving

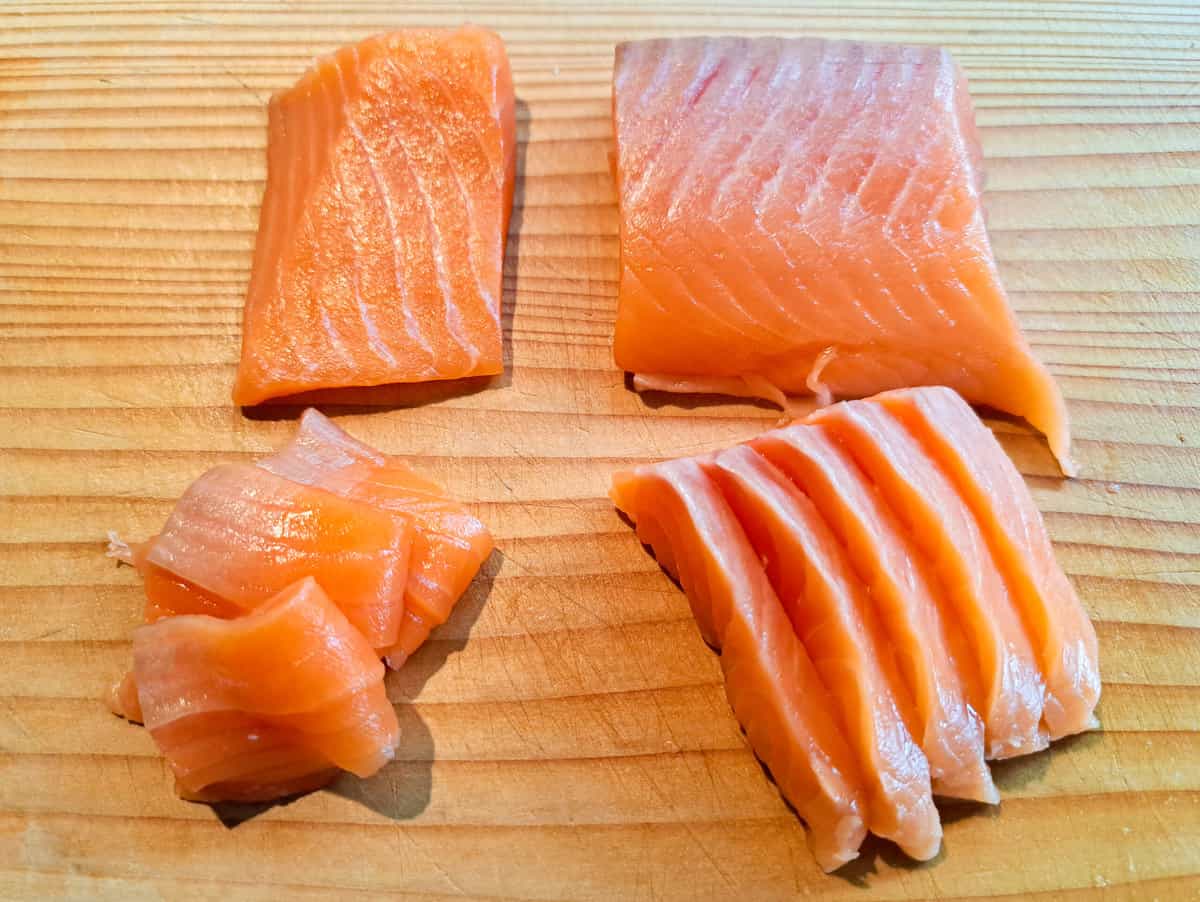
To ensure proper presentation and enjoyment of your sushi-grade salmon, it is important to master the art of slicing and serving. Start by using a sharp, thin-bladed knife to slice the cured salmon into thin, uniform pieces. Cutting at a slight angle will create elegant slices. Arrange the slices on a serving plate or sushi platter, and garnish with traditional sushi accompaniments like wasabi, pickled ginger, and soy sauce. Serve your beautiful slices of salmon with sushi rice or enjoy them on their own as sashimi. Remember to savor each bite and appreciate the delicate flavors of your homemade sushi-grade salmon.
Techniques For Slicing The Cured Salmon Into Sushi-ready Slices
When it comes to slicing the cured salmon into sushi-ready slices, precision is key. Here are some techniques to ensure perfect slices:
- Use a sharp, thin-bladed knife: A sharp knife will make clean cuts and prevent tearing.
- Cut at a slight angle: Cutting the salmon at a slight angle will create elegant slices and enhance the presentation.
- Slice uniformly: Aim for thin, uniform slices to ensure consistency in texture and flavor.
- Remove the skin: If desired, peel off the skin before slicing to achieve a smooth and refined appearance.
Remember to handle the salmon with care and take your time to create beautiful slices that will showcase the delicate flavors of your homemade sushi-grade salmon.
Tips For Serving Sushi-grade Salmon And Creating Delicious Sushi Dishes
- Pair your sushi-grade salmon with complementary flavors and ingredients, such as pickled ginger, soy sauce, wasabi, or ponzu sauce, to enhance the taste and experience.
- Experiment with different combinations and toppings to create unique and flavorful sushi rolls.
- Consider adding fresh vegetables like cucumber, avocado, bell peppers, or asparagus to add texture and freshness to your sushi.
- Explore various sushi roll techniques, such as maki rolls, inside-out rolls, or hand rolls, to showcase your beautifully cured salmon.
- Don’t forget to garnish your sushi with sesame seeds, green onions, or spicy mayo for added visual appeal and flavor.
- Serve your sushi-grade salmon promptly after preparation to ensure optimal taste and texture.
- Enjoy the artistry and craftsmanship of sushi-making, and share your delicious creations with friends and family for a memorable dining experience.
Frequently Asked Questions: How to Cure Salmon for Sushi
Q: Why is it necessary to cure salmon for sushi?
A: Curing salmon helps to enhance the flavor and texture of the fish. It also helps to remove any potential bacteria or parasites, making it safe to eat raw.
Q: What is the easiest way to cure salmon for sushi?
A: The easiest method is by using kosher salt and sugar. The mixture draws out moisture from the fish, creating a firmer texture and intensifying the flavors.
Q: How long does it take to cure salmon?
A: The curing process can take anywhere from 24 to 48 hours, depending on the thickness of the salmon fillet.
Q: What ingredients do I need to cure salmon for sushi?
A: You will need fresh salmon fillets, kosher salt, sugar, plastic wrap, and a baking dish or tray.
Q: Can I use any type of salmon for curing?
A: It is recommended to use sushi-grade salmon or wild-caught salmon that is free of antibiotics and artificial coloring for the best results.
Q: Do I need to remove the skin before curing the salmon?
A: It is a matter of personal preference. If you prefer sushi with skin, you can leave it on. Otherwise, the skin can be removed.
Q: How do I cure salmon using the salt and sugar method?
A: First, mix equal parts of kosher salt and sugar in a bowl. Place the salmon fillets on a baking dish or tray, skin side down. Generously sprinkle the salt and sugar mixture over the fillets, ensuring they are completely coated. Wrap the dish tightly with plastic wrap and refrigerate for 24 to 48 hours. After curing, rinse the fillets under cold water to remove any excess salt.
Q: Can I add additional flavors to the curing mixture?
A: Absolutely! You can be creative and add spices, herbs, or even citrus zest to the curing mixture to infuse extra flavors into the salmon.
Q: How should I store the cured salmon?
A: Once the salmon is cured and rinsed, pat it dry with paper towels and wrap it tightly in plastic wrap. It can be stored in the refrigerator for up to three days before use.
Q: Is it safe to eat cured salmon raw?
A: Cured salmon is typically safe to eat raw, but it is crucial to ensure that it has been properly cured and stored in the correct conditions. Always buy fresh, high-quality ingredients from trusted sources to reduce any risks.
Remember, curing salmon for sushi requires time and attention to detail. Follow proper food safety guidelines and experiment with different flavors to create your own delicious and safe homemade sushi. Enjoy!

A small, independently run fish and chip shop using quality ingredients cooked freshly in our kitchen to ensure great tasting food. All of our drinks are in glass bottles, and all of our takeaway packaging is recyclable or compostable to help reduce our impact on the environment.